
eBay
eBay channel integration
Integrating eBay with Widdop Dropship lets you download your orders, in addition to controlling stock levels and prices.
Widdop Dropship can be integrated with one or more eBay accounts. This lets you download orders and update listings with stock levels.
The list of sales channel integrations has 4 columns:
- The brand logo of a channel
- The company name of a channel
- The name of the specific channel integration
- The status of the integration (a blue yes means that it is enabled, a grey no means it is disabled)
Global Shipping Programme: Widdop Dropship supports the eBay Global Shipping Programme. This means that orders may not show the customer's name in the address field, as it will initially go to an eBay processing centre to be forwarded to another country and the customer.
If this is enabled on your listings, it is an easy way to reach out to international customers on eBay.
Creating a new eBay integration
To create a new sales channel integration:
- Open 'settings' and select 'sales channel integration'.
- Click the 'add sales channel' button.
- Click on the 'add' button next to eBay and click 'next' to continue.
- Enter a name for this integration and click 'next' to continue.
- Select the country you're selling in through this integration and click 'next'.
- Click 'authkey' and sign in to your eBay account.
- Click 'agree'. You'll then see confirmation of receiving an authorisation token before returning to Widdop Dropship.
- Click 'next' to continue.
- You will be returned to the sales channel list in Widdop Dropship, with a new row added for your new integration.
Ensure that your channel has stock updates enabled to ensure that your listings don't oversell.
- Click on the channel name.
- Click on additional settings.
- Toggle the switch for stock update to yes.
- Click save.
Disabling an eBay integration
When you create a new channel integration, it is automatically enabled and active.
To temporarily disable the integration and stop it downloading orders and updating listings:
- Open 'settings' and select 'sales channel integration'.
- Choose which integrated sales channel you want to disable and toggle the status switch from 'yes' to 'no'. The channel will then be disabled.
Enabling an eBay integration
To allow an integration to resume downloading orders and updating listings:
- Open 'settings' and select 'sales channel integration'.
- Choose which integrated sales channel you want to enable and toggle the status switch from 'no' to 'yes'. The channel will then be re-enabled.
Removing an eBay integration
If you no longer wish to have Widdop Dropship connected to an Amazon channel, it can be easily removed. Once deleted, you will need to re-create the integration from scratch should you choose to re-use it.
To remove the integration:
- Open 'settings' and select 'sales channel integration'.
- Find the integrated sales channel you want to remove and click its name to open the integration.
- Click the red 'remove account' button and click 'OK' to confirm.
- You will be returned to the list of channel integrations.
Click 'cancel' if you decide not to delete the integration.
If you delete an integration and then reintegrate the same channel, the analytics and reports will not recognise orders from the two integrations as being from the same site.
Updating or verifying eBay integrations
If Widdop Dropship is having issues downloading from a sales channel, the causes of this can be easily checked. In 'settings ', select 'sales channel integration ' to ensure that you are connecting to the correct website end point.
To update or verify a channel integration:
- Find the relevant channel integration and click its name to open the integration.
- Click 'reauthorise'.
- Check that the seller ID is correct and the correct site is selected.
- Check the 'auth key' is correct.
- Click 'save' to apply any updates or changes to Widdop Dropship.
- You will be returned to the list of channel integrations.
Click 'cancel' if you decide to not change/update the integration
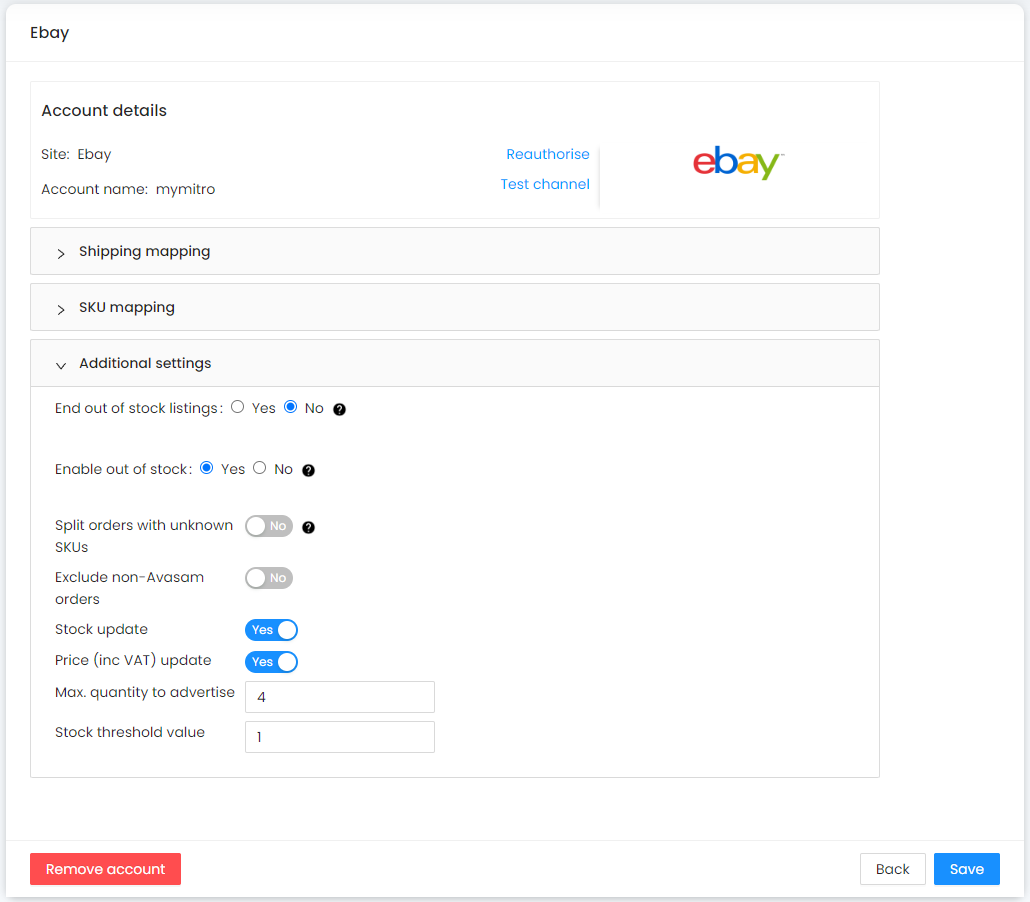
eBay listings have a history, which is used by it when deciding how high to rank the listing in search results - Older listings tend to have a better chance of showing up high in search results.
This history is lost if the listing is out of stock and ended. They provide a mechanism called "out of stock" which allows you to keep the listing alive, but to hide it from searches and mark it as the product being out of stock.
- To enable the out-of-stock option:
- Go to my eBay > account > site preferences or seller hub > overview > shortcuts > site preferences.
- In the selling preferences section, click s how next to Sell Your Item form and listings.
- Click edit next to the use the out-of-stock option.
- Make your selection and click Submit.
- In Widdop Dropship, setup your integration to recognise the out of stock setting you have made in eBay.
- Go to settings > sales channel integrations.
- Click on the edit button under actions for your eBay integration.
- Click on additional settings to expand the section.
- Set end out of stock settings to no.
- Set enable out of stock to yes.
- Click on save.
Updating settings for stock updates in your integration
When Widdop Dropship receives a notification that available stock levels have changed from the supplier, it updates the relevant mapped listings on the sales channel.
In a small number of cases, it is possible that popular items may oversell.. To avoid this, you can make adjustments to the stock levels Widdop Dropship sends to the channel for products to reduce the concern about cancelling and refunding orders.
Widdop Dropship lets you set a 'stock threshold value', meaning that when the stock level reaches that level, it sends '0' to the listing(s) affected, to prevent excess orders affecting your account.
In addition, some eBay accounts may have limitations placed on them as to how many units or individual products you can advertise for sale. To mitigate this, Widdop Dropship supports the 'max quantity to advertise ' feature provided. This means you can control how many units of stock the channel will see across your listings to maintain your overall permitted level without sanctions.
If you had a limitation of 500 units, and you were selling 4 SKUs, you could set the 'max quantity to advertise' as 125, and even if there were 600 of each item at the supplier, eBay would only see 500 total items advertised.
To do this:
- In 'settings', select 'sales channel integration'.
- Find the relevant channel integration and click its name to open the integration.
- Scroll down to the 'additional settings' section heading.
- Click on the 'additional settings' section heading to open up the settings menu.
- Update the value for 'max quantity to advertise', if required. The default value is '0', meaning it's inactive.
- Update the 'stock threshold value' if required. This defaults to '5' for your protection.
- Click 'save' to apply any updates or changes to Widdop Dropship.
- You will be returned to the list of channel integrations.
Click 'cancel' if you decide to not change/update the integration.
Excluding non-Avasam orders
Widdop Dropship can download orders for products not linked in Widdop Dropship - This is useful if you don't immediately map listings after creating them. Alternatively, if you sell some of your own stock alongside Widdop Dropship orders, it can clutter up the order screen. Non-Avasam orders are deleted after 3 days if not for mapped products.
To avoid seeing those orders:
- In 'settings', select 'sales channel integration'.
- Find the relevant channel integration and click its name to open the integration.
- Scroll down to the 'additional settings' section heading.
- Click on the 'additional settings' section heading to open up the settings menu.
- Set the exclude non-Avasam orders switch to off, or grey.
- Click 'save' to apply any updates or changes to Widdop Dropship.
- You will be returned to the list of channel integrations.
You cannot make exclude non-Avasam orders and split orders with unknown SKUs active simultaneously, only one at a time can be active, or neither.
Splitting order containing Widdop Dropship and non-Avasam SKUs
Where some of your orders contain a mix of Widdop Dropship and non-Avasam products, this setting allows you to process the Widdop Dropship products and not import the unknown items. When set to no, you will only import these orders if exclude non-Avasam orders is set to no.
To enable this:
- In 'settings', select 'sales channel integration'.
- Find the relevant channel integration and click its name to open the integration.
- Scroll down to the 'additional settings' section heading.
- Click on the 'additional settings' section heading to open up the settings menu.
- Set the split orders with unknown SKUs switch to on, or green.
- Click 'save' to apply any updates or changes to Widdop Dropship.
- You will be returned to the list of channel integrations.
eBay SKU mapping
This guide ensures that Widdop Dropship can fulfil and invoice your eBay orders with the correct items.
Create a new SKU mapping
When you list a product on eBay, you need to ensure that Widdop Dropship knows what is in orders from the listing by mapping the product to it.
- Click on settings.
- Click on sales channel integrations.
- Locate the eBay channel you listed on, and click on the name.
- Click on SKU mapping.
- Click on the SKU mapping tool button.
- You can search for the listing you want to map by entering all or part of the SKU or title into the search bar under sales channel SKUs.
- Select 'download' from the actions available field to grab the latest information from the site if the listing is not shown.
- Search for the Widdop Dropship SKU to map this against under the Widdop Dropship SKU heading, then select the SKU and click 'map them' to the right of it.
- Click 'save' to apply this mapping to Widdop Dropship.
To further filter the listings and products shown in either list, use the unmapped SKUs and mapped SKUs options. This will reduce the volume of results shown
Changes made will only affect orders downloaded after new mapping is in place. It will not affect orders already in Widdop Dropship.
Editing existing SKU mappings
- Click on settings.
- Click on sales channel integrations.
- Locate the eBay channel you listed on, and click on the name.
- Click on SKU mapping.
- Click on the SKU mapping tool button.
- You can search for the listing you want to map by entering all or part of the SKU or title into the search bar under sales channel SKUs.
- You can click on unlink to break the mapping.
- Search for the new SKU you want to map the Widdop Dropship or sales channel SKU to, and click on map..
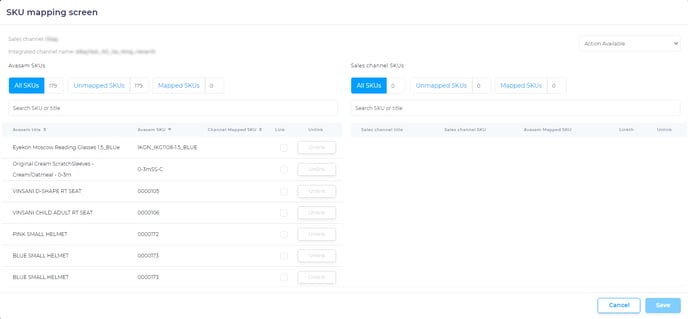
Delete a SKU mapping
To delete a SKU mapping:
- You can search for the listing you want to change by entering all or part of the SKU or title into the search bar under Widdop Dropship SKUs or sales channel SKUs.
- Click the unlink button to sever the mapping.
- Click 'save' to apply this change of mapping to Widdop Dropship.
eBay shipping mapping
This guide ensures that Widdop Dropship can fulfil and invoice your eBay orders with the correct shipping services for the supplier.
Create a new shipping mapping
To create a new shipping mapping:
- Select the service you want to map under the 'Sales channel shipping service' drop down list
- Select the Widdop Dropship shipping service to map this against under the 'Widdop Dropship shipping service' drop down list.
- Click 'Map field'.
This will only affect orders downloaded after it is mapped.
It will not affect orders already in Widdop Dropship.
If you want the shipping service paid for by the customer to automatically select the correct shipping provider and service when the order is downloaded to Widdop Dropship, then you will need to map the services from the site/channel to those in Widdop Dropship.
The 'Shipping mapping' section will list any existing mappings. This will open a new window that includes information about the available Widdop Dropship shipping services, and the services available on the integrated account.
You can open/expand the 'marketplace to Widdop Dropship' shipping mapping section by clicking on the arrow to the right of the title.
If any services are already mapped, then they will be reflected here.
Delete a shipping mapping
To delete a shipping mapping:
- Locate the service.
- Click the 'X' to the right of the service.
- Click 'Save' to apply the change.
How can I list my products on eBay?
Our eBay listing tool gives you the ability to put your sourced products in front of millions of potential customers.
Before you can list a product you must ensure that you have sourced products and integrated your eBay account.
Ensure that the title, description, shipping price and selling price are correct before listing a product.
Listing a product on your eBay store
- Open listing manager.

- Click on the listings button for your eBay store.
- Select one or more products to list that don't have tick icons by their entry by selecting/ticking the left hand box for the product(s).
- Select a Listing Profile for the listing.
- If you want to add or remove images from the listing, click on the edit, or pencil icon beside the image column.

- Check the title is correct. You can click in the field to edit it.
- Click on the description icon to confirm you are happy with how the description of the item will be displayed. Make and save any changes here.
- Click the edit/pencil icon under categories to confirm the eBay and store categories this item will be listed under, and amend them if necessary.
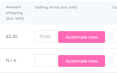
- Set a price, or click on the automate now button to setup a pricing rule to manage the price of the item.
- If it's a variation product, click on the + button.
- Click on list at the bottom of the screen.
- Widdop Dropship will report item listed successfully.
- The screen will refresh. You may now need to change the filter settings to show the product(s) you listed.
- If there is an error with the process, then this will be reflected by a red error icon (see below). Otherwise the status will change to listed (a green tick).

Remember to ensure that if you select a shipping policy that doesn't have a valid shipping service, you have a shipping service selected manually instead, or there will be an error when you try to list the product(s)
Creating a listing profile for your eBay listings
A listing profile can be associated with eBay business and shipping policies, and if you do so, then those policies will override any settings you make locally, in the Widdop Dropship listing profile.
- There are 2 methods to enter the listings profile screen:
- Select listing manager.
- Locate your eBay channel integration on the list.
- Look to the right of the screen for the listing profile icon.
- Click on the listing profile icon.
- To create a new profile, click on the add new profile button.
- From the listing manager screen:
- Locate the listing profile column to the left of the screen.
- In the dropdown list for the product you want to list, select:
- The new listing profile option.
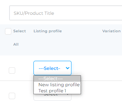
- The new listing profile option.
- Select listing manager.
- Enter a name to identify the listing profile.
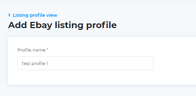
- Click save.
- Each profile consists of the following sections:
- Settings
- Returns
- Shipping
- Payments
- Categories
- Specifications
- Description
- Clicking on the button under settings allows you to set:
- Listing duration (How many days the listing will be available). GTC means good til complete, or live as long as stock is available. We recommend this as the default.
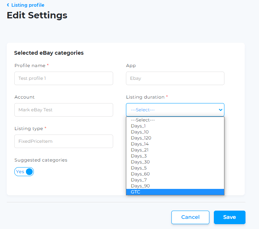
- Listing type (Defaults to FixedPriceItem). Widdop Dropship doesn't support auction listings.
- Inclusive VAT rate (Y/N). Does the price you set on the listing include VAT?
- If you answered yes, you will need to specify the VAT rate used so that the system can calculate the ex VAT price.
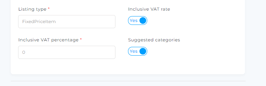
- If you answered yes, you will need to specify the VAT rate used so that the system can calculate the ex VAT price.
- Suggested categories (Y/N). Should the suggested categories for the item be included?
- Listing duration (How many days the listing will be available). GTC means good til complete, or live as long as stock is available. We recommend this as the default.
- Click save to continue.
- Clicking on the button under returns allows you to set your policies around customers returning items:
- Return business policy allows you to select one of your business policies from your eBay account (if any).
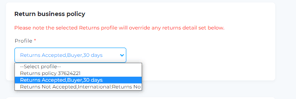
- Return accepted - Specify whether you accept returns for the product.
- Return paid by - Who will pay to return the item?
- Return within - how long is your returns window?
- 14 days
- 30 days
- 60 days
- Detailed return policy explanation. Insert a longer explanation of your returns policy and any applicable legal references.
- Return business policy allows you to select one of your business policies from your eBay account (if any).
- Click save to continue.
- Clicking on the button under shipping allows you to set your policies around customers returning items:
- Return business policy allows you to select one of your business policies from your eBay account (if any).
- Return accepted - Specify whether you accept returns for the product.
- Return paid by - Who will pay to return the item?
- Return within - how long is your returns window?
- 14 days
- 30 days
- 60 days
- Detailed return policy explanation - Insert a longer explanation of your returns policy and any applicable legal references.
- Return business policy allows you to select one of your business policies from your eBay account (if any).
- Click save to continue.
- Clicking on the button under payments allows you to set your preferences around shipping your products to customers:
- Payment business policy allows you to select one of your payment policies from your eBay account (if any).
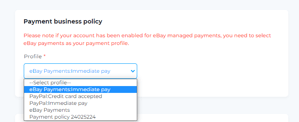
- Credit card accepted (Y/N) - allow eBay to accept credit card payments on your behalf.
- PayPal (Y/N) - allow seller to make payments to your PayPal account.
- Email - specify the email address associated with your PayPal address.
- Click save to continue.
- Clicking on the button under Categories allows you to set the categories to be used when listing items:
- Search for eBay main catalogue categories in the top search box.
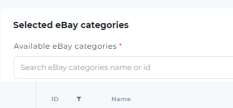
- Use either their name or ID number to search.
- Click on the check box beside the category name to add it to your selected categories list.
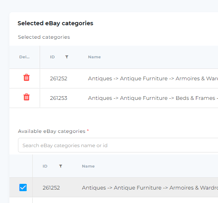
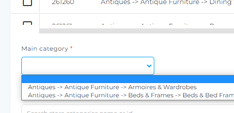
- Remember to choose a main category for the listing(s).
- If you have store categories, you can search and select from them in the second/lower search box.
- Use either their name or ID number to search.
- Click on the check box beside the category name to add it to your selected categories list.
- Click save to continue.
- Clicking on the button under Categories allows you to set the categories to be used when listing items:
- Search for eBay main catalogue categories in the top search box.
- Use either their name or ID number to search.
- Click on the check box beside the category name to add it to your selected categories list.
- Remember to choose a main category for the listing(s).
- If you have store categories, you can search and select from them in the second/lower search box.
- Use either their name or ID number to search.
- Click on the check box beside the category name to add it to your selected categories list.
- Click save to continue.
- Clicking on the button under item specifics allows you to map the information needed to make the best possible listing in the categories selected when listing items. The more information, the better the chance someone will find and purchase from your listing(s).
- The entries shown will vary based on the catalogue categories you selected. Click on each field for a drop down list of available values.
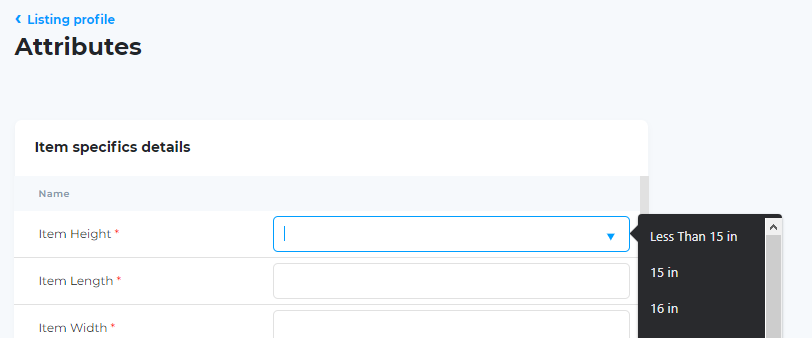
- You must select values for fields with a red asterisk beside them. These are usually at the top of the list.
- Click save to continue.
- Clicking on the button under description template allows you to setup a template that will pull information from your product and display it ina consistent manner. You can also add in brand details or information about your store.
- The insert description tag dropdown allows you to insert tags which will be replaced by the content of a given field for the individual item being listed.
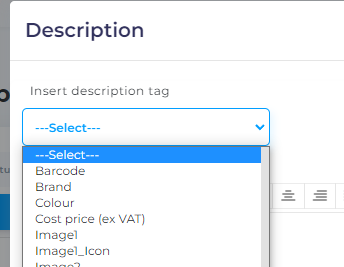
- There are also controls for text layout, etc to control the other text being shown.
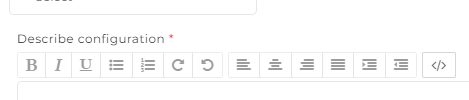
- Click save to continue.
Listing profiles can be deleted using the X on the right of the entry. Do not delete entries that are currently in use to avoid causing issues when updating those listings.
One-Click Listing for eBay Store
Open the Search Products Page
- Find the product you want to list.
- Apply various filters available on the Search Products Page to identify the best product to start with.
- Click on the selected product to navigate to its product page.
Product Page Interface
You will see a product page with several options, including:
- Source Product
- List Product
- Add to Cart
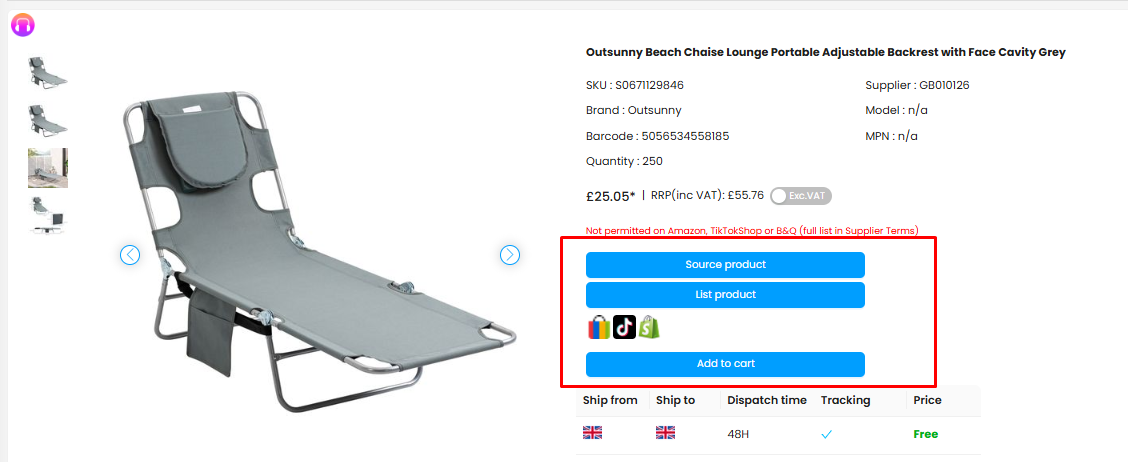
If your eBay account is integrated with Widdop Dropship, an eBay icon will be visible beneath the "List Product" option.
Similar icons will be visible for multiple stores or platforms integrated with Widdop Dropship, such as eBay, TikTok Shop, etc.

Hovering over the integration icon will display listing status for the respective product for the concerned integration.
Listing a Product
- Click on "List Product".
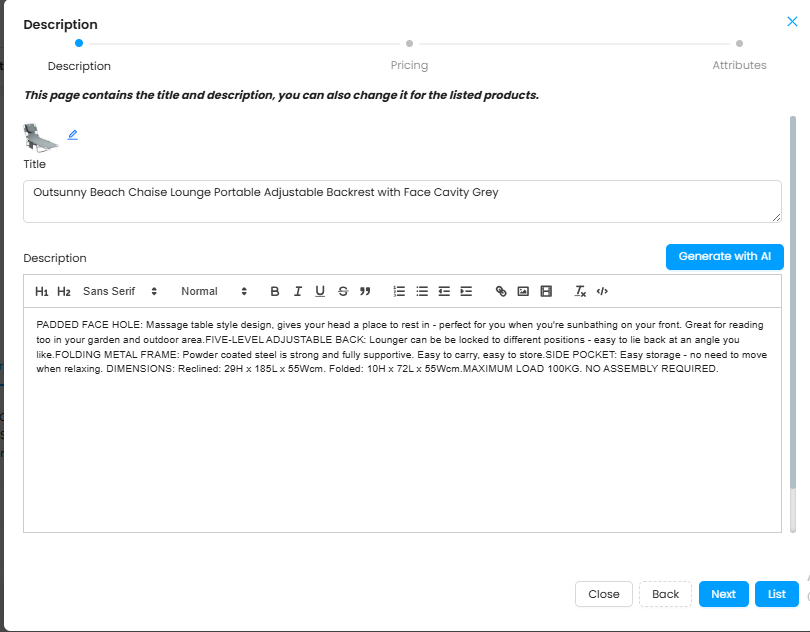
- A description box will appear for the selected product.
- Modify the Title and Description as needed.
- Use the "Generate with AI" option to create a suitable title and description, provided AI credits are available.
- Upon clicking "Generate with AI", a success message will appear.
Note:
- A blue-outlined box in the Title section indicates that the title meets the title limit.
- A red-outlined box indicates issues such as exceeding the character limit.
After finalizing the title and description, click "Next" at the bottom-left of the screen.
Pricing Setup
- The Pricing Box will appear.
- Select a pricing rule from the "Select Pricing Rule" dropdown (visible only if a pricing rule has been set previously).
- If a pricing rule is applied, the selling price will adjust automatically.
- If no pricing rule exists, manually set the selling price.
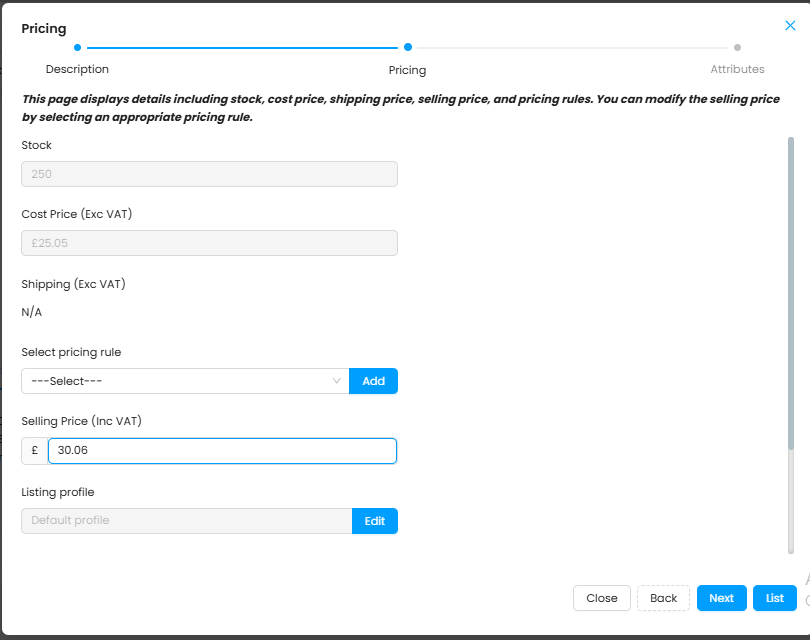
Setting a pricing rule is recommended for consistency.
Click "Next" at the bottom-left of the screen.
Please note if you have integrated eBay and wish to list on eBay using this feature. For the first time, you will need to create the Business policies on your eBay for:
- Payment
- Return
- Shipping
You can create them using the link below: https://www.ebay.com/bp/manage
Once you have created all 3 of the policies, you can move forward with the listing process and it will ask you to select the policies, these will populate the policies that you created on your eBay.
Category Selection
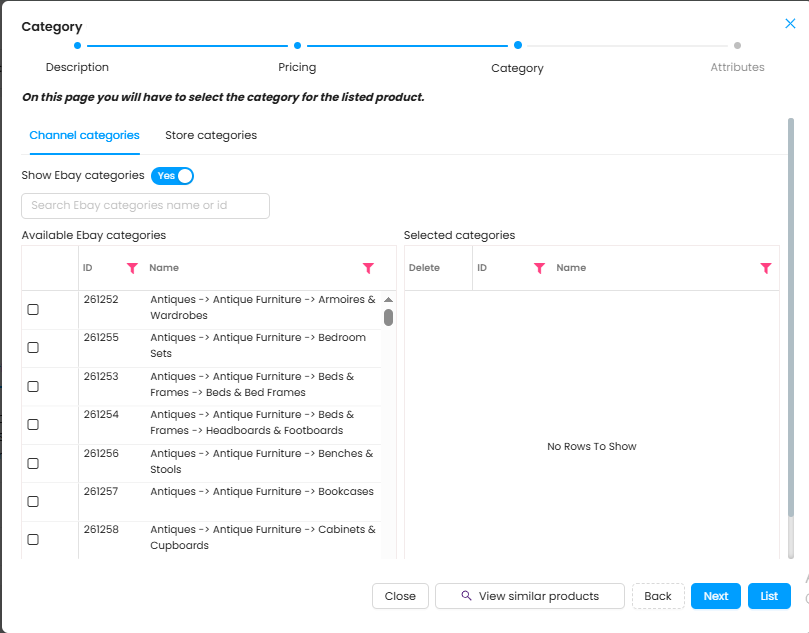
- The Category Selection page will appear.
- Choose the relevant category for the product from Available eBay Categories.
- Alternatively, search for the product's category using the search bar.
- After selecting a category, choose the Main Category.
- Use the "View Similar Products" option to find related listings on eBay.
Click "Next" at the bottom-left of the screen.
Attribute Page
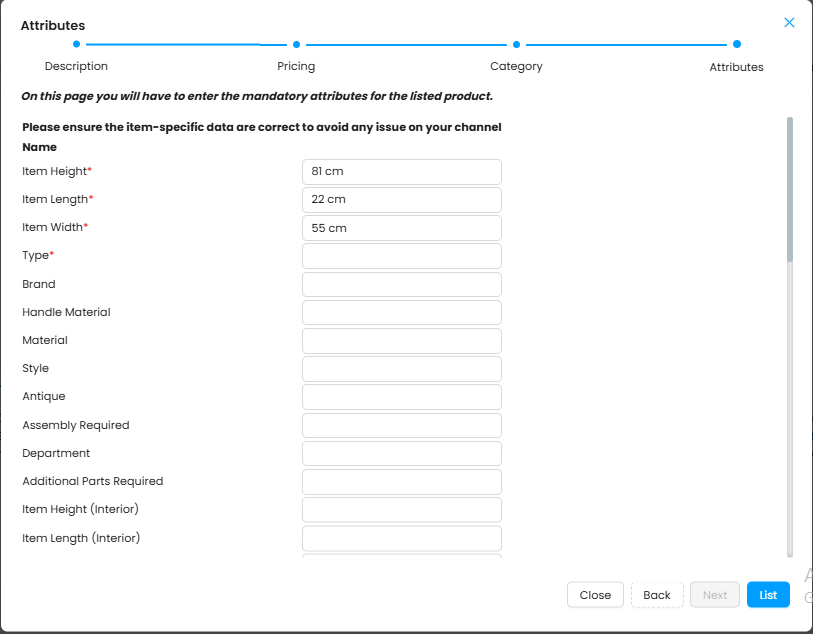
- Enter all item-specific details mandatory (denoted by red asterisk) for the product listing.
- Providing more details improves clarity regarding the product and its dimensions.
- Complete all necessary details and click "List" at the bottom-right corner.
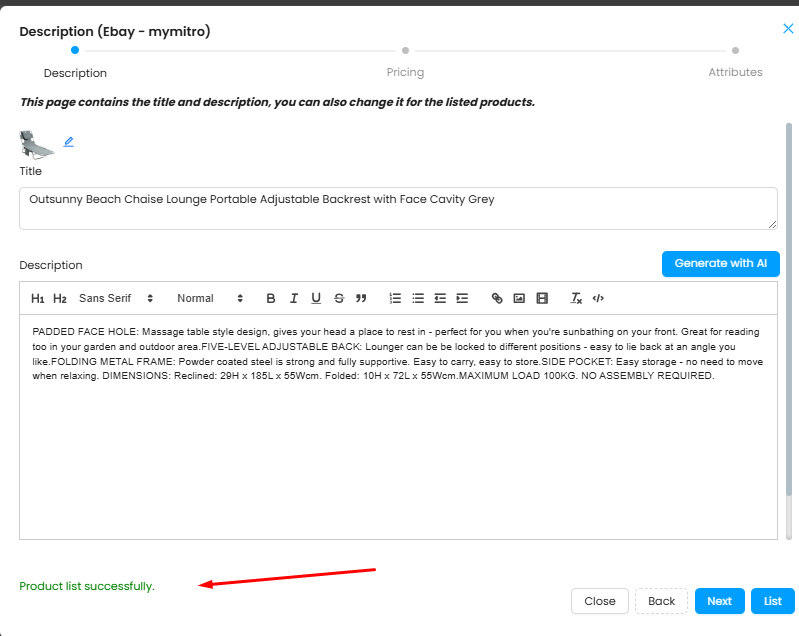
- Upon clicking "List", a success message will appear in the top-right corner.
- A green "Listed Successfully" message will appear in the bottom-left corner of the menu.
Double-check the product details to ensure accuracy before finalizing the listing.
Verify that the product has been listed successfully on your eBay store.
Deleting a Listed Product
- Go to Listing Manager.
- Search and Select the product.
- Tick the checkbox and click "Delete" to remove the product from the sales channel.
Note:
The "Remove Sourced Product" option cannot be used to delete a listed product; attempting to do so will result in an error message.